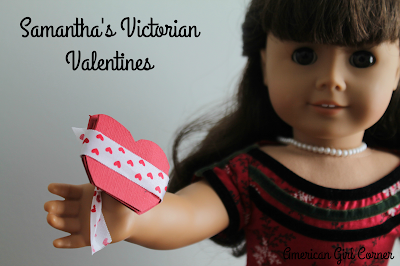
One of Samantha's favorite things to do was to make Valentines for her friends and family. Aunt Cornelia would help Samantha piece together her elaborate Valentines. Today, I am going to show you how to make your own Victorian-inspired Valentine card, just like Samantha would have.
Victorian Valentines were super detailed and elaborate. You can check out my Pinterest board
here to see some ideas and my sources for this activity.
- Think nature & Cupid. Victorian Valentines featured lots of deer, birds, dogs, flowers, young children, and Cupid.
- Lot of layers! The Victorians loved layering. They liked a busy card with lots of decorations.
- Gold and lace. Doilies were very popular as well as anything gold.
- Good penmanship. Penmanship was considered a work of art, so most cards had the message beautifully written.
- Punny sayings. Bee mine, forget me not, etc.
Let's get started! You can use almost any card making supplies, but here are a few ideas...
- Ribbon
- Print outs (I saved you a few on Pinterest, and you can find more through Google.)
- Cardstock-- pink, white, red, etc.
- Hole puncher
- Scissors
- Glue
- Sharpie Markers-- gold, black, silver
- Doilies
In the top picture of Samantha, her card actually expands! It's a bunch of hears linked together which have "I Love You" written on it. Victorians were really into cutouts. I did this by making a heat shake on cardstock. I had a flat bottom on the heart so it can stand up straight. Then I traced it, slightly overlapping the heart on the wide part and cut it out. I did nice lettering and added some ribbon for a special touch.
I incorporated some ribbon into this one by stringing it though holes make with a hole puncher. I added a cutout I found on Google and did some nice lettering. The best part? This cute ribbon was only $1 at the Dollar Tree.
I glued a layer of light pink tissue paper over red cardstock and added some cutouts and a doily. Victorian-era Valentines tended to be very full-- what we might call cluttered today.
I love this ribbon! I got it for $1 at Walmart. I really liked the vintage, lacy look of it.
I incorporated a cut-out like I used for Samantha's valentine in the very top picture, as well as a doily and some cut outs, not to mention that pretty lacy ribbon! The dog, cherub, and woman are very romantic, Valentine-y Victorian era.
I hope my creations help inspire you! Be sure to share with me any Valentines you make via e-mail-- I love seeing you guys make my ideas your own.


